|
Lesson 4: How to Single Crochet
Appearance in pattern - sc
Single crochet is the shortest and most basic of all stitches.
Remember, you will never work in the first chain from the crochet hook, unless the pattern you are working specifically directs you to do so.
WORKING ROW 1: How to Single Crochet Row 1
We will now begin working Row 1 of single crochet.
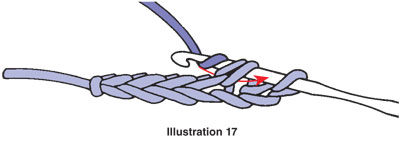
Step 1: Make a slip knot and chain 6. Skip the first chain from the crochet hook, insert hook in the second chain through the center of the V and under the back bar of the chain. Bring the yarn over the hook from back to front (see illustration 17). |
 |
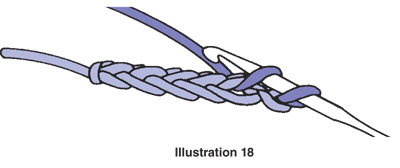
Draw yarn through chain and up onto the working area of the crochet hook. You now have two loops on the hook (see illustration 18). |
 |
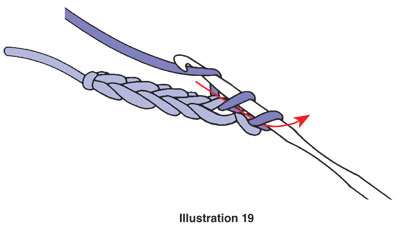
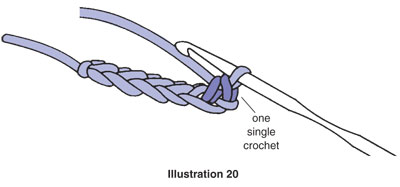
Step 2: Again, bring the yarn over the hook from back to front, and draw it through both loops on the crochet hook (see illustration 19). |
 |
One loop will remain on the hook; you have made one single crochet (see illustration 20). |
 |
::banner_s::
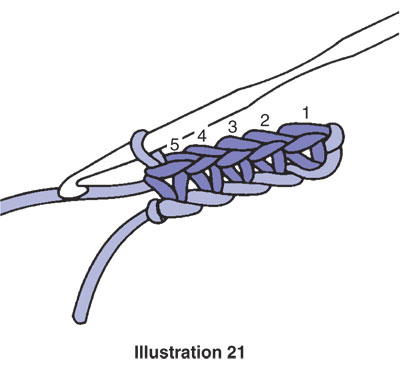
Step 3: Insert hook in the next chain as before, hook the yarn from back to front and draw it through the chain stitch. Yarn over again and draw through both loops. It is important to know that the terms hook the yarn and yarn over have the same meaning. In both instances, you will bring the yarn over the hook from back to front.
Repeat step 3 in each remaining chain, taking care to work in the last chain, but not in the slip knot. Remember, as you work, to be careful not to twist the chain; keep all the Vs facing you. You have completed one row of single crochet and should now have five stitches in the row (see illustration 21). |
 |
WORKING ROW 2: How to Single Crochet Row 2
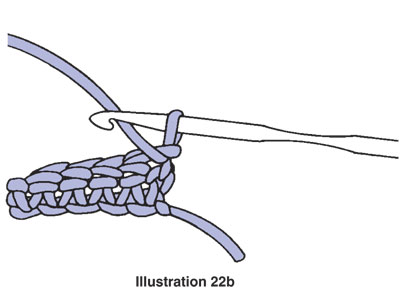
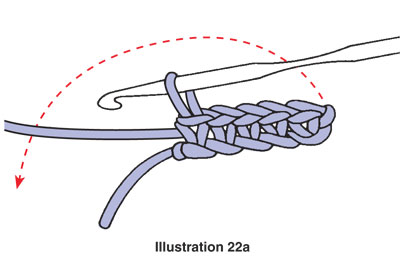
To work the second row of single crochet, you need to turn the work counterclockwise, as shown in illustration 22a, so you can work back across the first row.
Do not remove the crochet hook from the loop as you do this (see illustration 22b).
Now you need to bring the yarn up to the correct height to work the first stitch. So, to raise the yarn, chain 1 (this is called a turning chain). |
 |
This row and all the following rows of single crochet will be worked into a previous row of single crochet, not into the beginning chain as you did before. Remember that when you worked into the starting chain, you inserted the crochet hook through the center of the V and under the bar. This is only done when working into a starting chain.
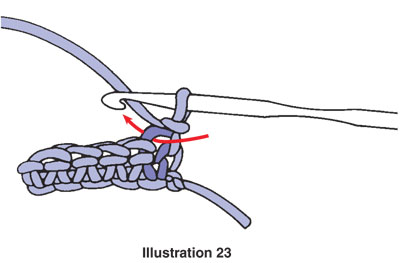
The first single crochet of the row is worked in the last stitch of the previous row (see illustration 23), not into the beginning chain. |
 |
Insert hook in the last stitch of the previous row under top 2 loops, bring the yarn over the hook from back to front and draw yarn through stitch and up onto the working area of the crochet hook. You now have two loops on the hook. Again, bring the yarn over the hook from back to front and draw it through both loops on the crochet hook.
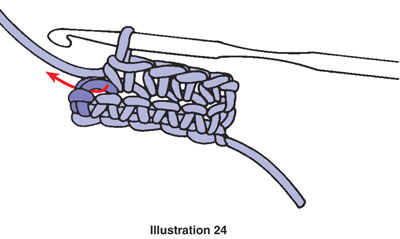
Work a single crochet into each single crochet to the end, taking care to work in each stitch, especially the last stitch, which is easy to miss (see illustration 24). |
 |
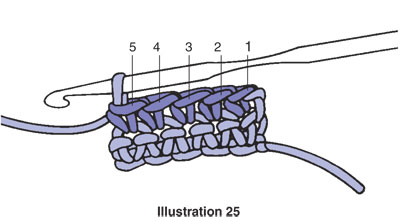
Lets stop now and count your stitches; you should still have five single crochets on the row (see illustration 25). |
 |
You can continue practicing or fasten off.
FASTENING OFF
After the last stitch, cut the yarn, leaving a 6-inch end. As you do when you take your crochet hook out for a break, draw the hook straight up, but this time draw the cut yarn end completely through the stitch. Pull the 6-inch end tight to close. |
|
|
|
|